Neon Lettering Effect Procreate Tutorial
- Isabelle

- Feb 5, 2021
- 3 min read
Trends are always recycling, and right now we are seeing a lot of retro, arcade like themes. For me, that means neon. I love neon signs, and I have finally figured out a great way to make neon-style lettering. Follow along with the tutorial below and you will have your own neon handwriting in no time!
Setting Up Your Canvas

The first thing we will need to do is set up a canvas. I just opened a square canvas. Once the canvas was created, I opened it up and changed the background color to a dark brown. You don't have to make it dark brown at all, it can be any color you like. Using a darker color will help the neon stand out.
Write Your Word

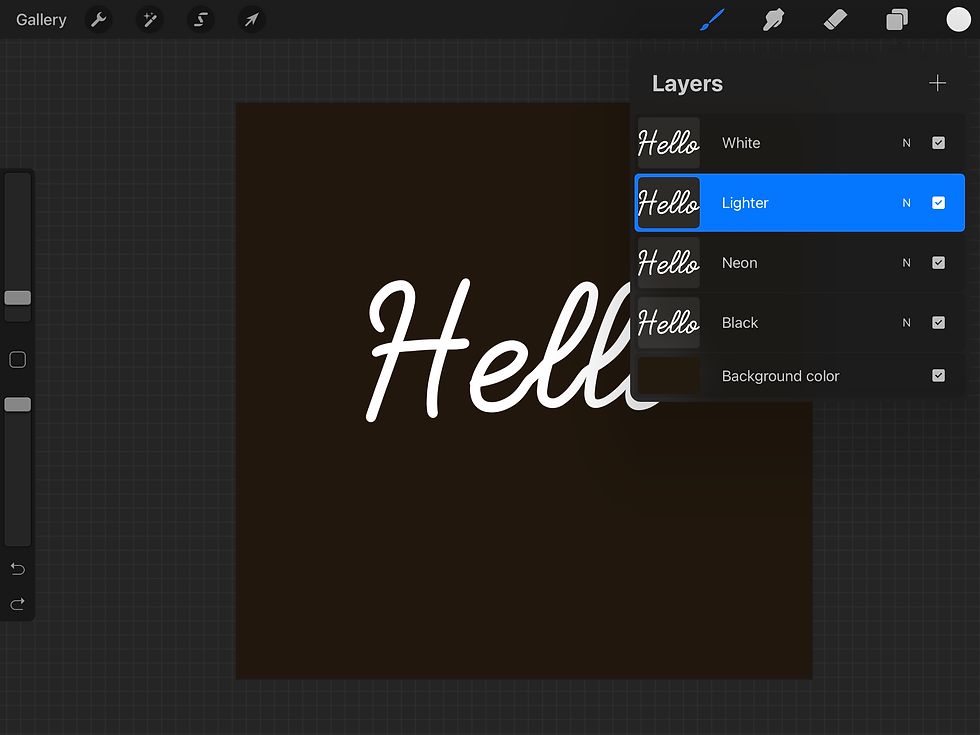
Next up, you will just need to write your word in white pen. For my drawing, I wrote "Hello" using the studio pen brush, but you can write anything using any sort of solid pen or even the type tool. The size isn't important either, although I have found that it is can be both too thin or too thick, so play around with it a little bit to find exactly what you are looking for!
Duplicate The Layers

Once you have written the word, duplicate the layer 3 times (so you have 4 layers that look the exact same.) You can do this by swiping the layer towards the left side of the screen and select the "duplicate" box. It is helpful to name the layers. I named mine (from top to bottom) White, Lighter, Neon, and Black.
Adding Color

Choosing the colors for your neon is super fun. I used the 4 colors here. To start adding color, select the "neon" layer, and swipe it towards the right side of the screen to turn on alpha lock. This means you can color over the drawing you have made, but it will only color inside of the words you have written on that layer. You won't see the color change because it is behind the "white" layer. Select the "lighter" layer and do the same thing, and use a color that is a few shades lighter than the original neon color. Once you are done, select the "black layer" and color it in black, using alpha lock like before.
Making The Neon Effect

Select the neon layer and select the effects tool and tap "Gaussian Blur". We want to blur the whole layer, so select "layer" and drag your pen from the left side of the screen towards the right, only until the percentage number says 10%. After that, select the "Lighter" layer and do the same thing, only dragging until the number says about 7-8%.
Once you are done with all of that, select the "black" layer and tap on the cursor arrow icon from the tools bar. Move the black layer down and to the right just slightly to create a shadow effect.
Optional Steps:

When you are done, you can use a thin, black monoline to draw a power cord from off the screen to connect all of the the letters in a layer below all of the neon lettering layers. You can also use a large textured brush (I used stone wall from the industrial brushes) and on a new layer with a lighter color than your background color, add some texture.
And you're done! I hope you enjoyed this tutorial and make sure to tag me on social media if you try it out yourself.

Isabelle


Comments